Step 1
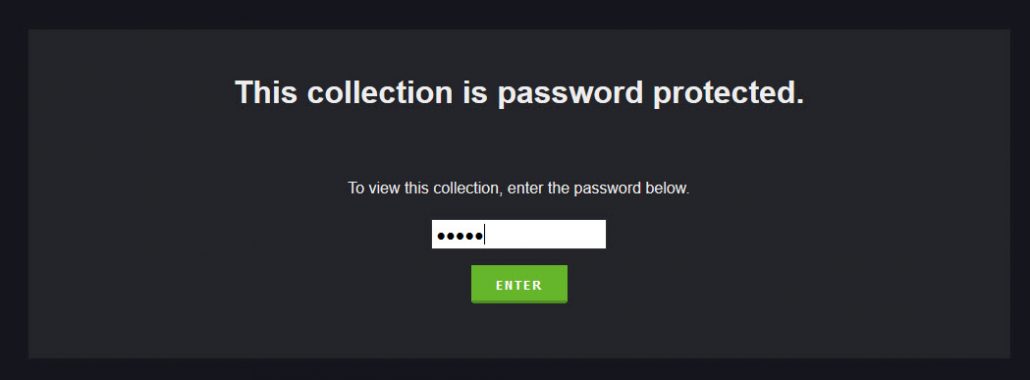
Access your proofs gallery by using the link and password you receive by email. The images in your proofs gallery are watermarked and delivered at a low resolution. Your final, edited images are delivered at full resolution with no watermarks. Your final edited images will look much better than the proofs — often dramatically so. We use strong, state-of-the-art encryption to protect our clients’ photos.
Step 2
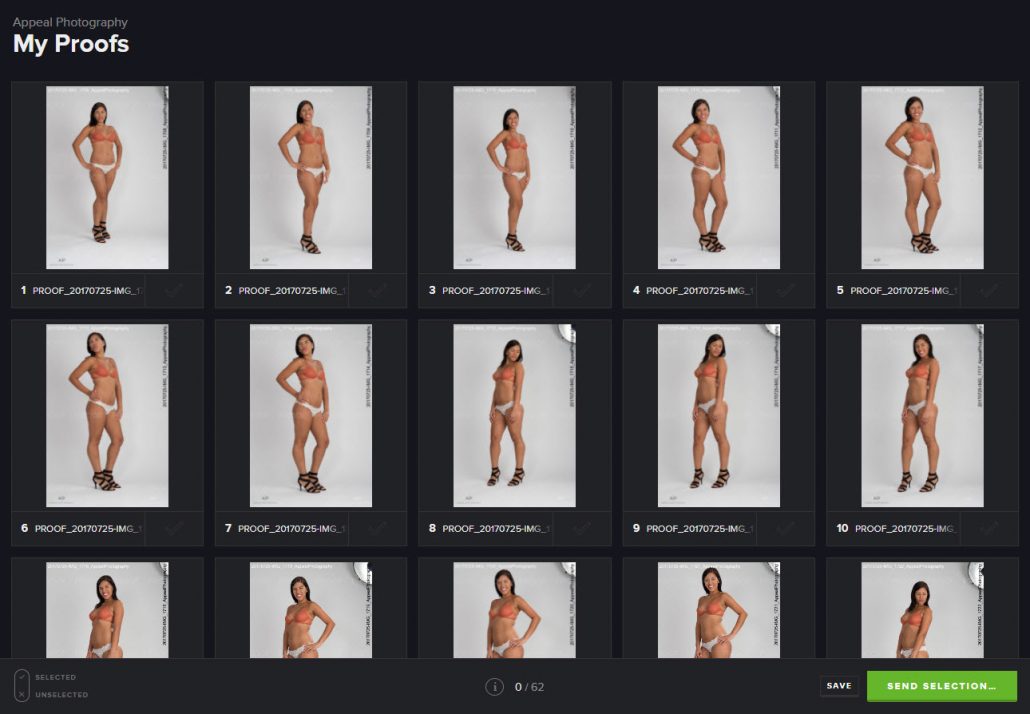
You’ll initially see a gallery of thumbnails of all your proofs. Click on any thumbnail to enlarge the image.
Step 3
Click on the check mark at the bottom right of a thumbnail or enlarged image to select an image (click the checkmark again to de-select).
You can see how many images you’ve selected at the bottom center of the gallery view. In this example 5/62 means 5 images have been selected for editing out of a total of 62 in the gallery.
Step 4
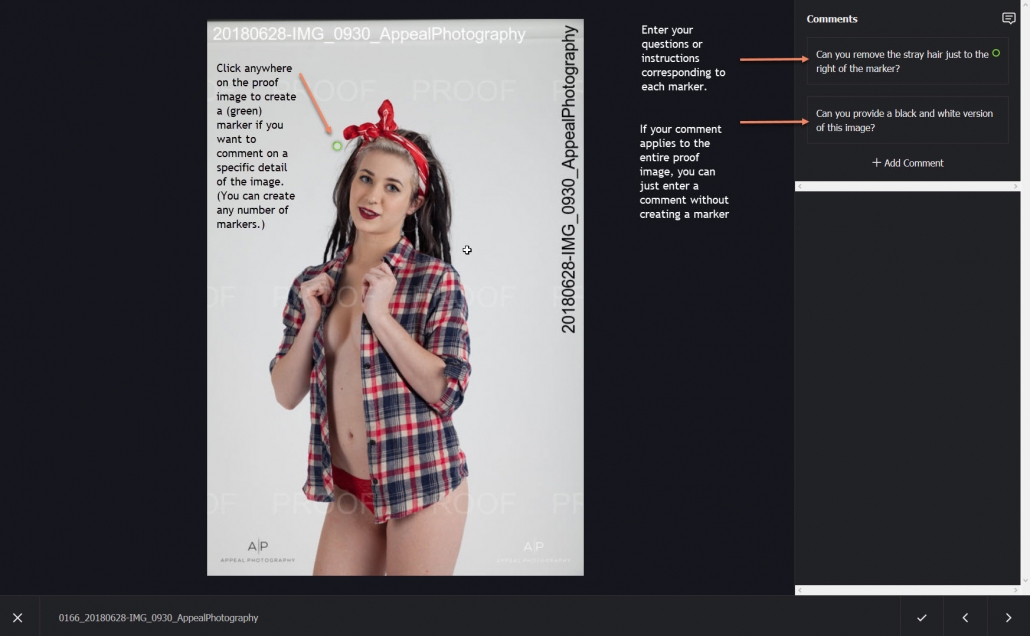
When you view the large version of a proof image you’ll see a comments pane to the right of the image where you can provide your comments, questions and/or instructions. If you have a comment about a specific part of the image, you can click on that part of the image and a small green marker will appear. You can then make a comment related to that marker. If you have a general comment about the image, simply click on “+ Add Comment” in the comments pane.
We will automatically remove studio elements, such as lights and light stands, from each image, so you don’t need to comment on those. For a full list of what is included (and excluded) in touch-up editing, please see your agreement and invoice.
Step 5
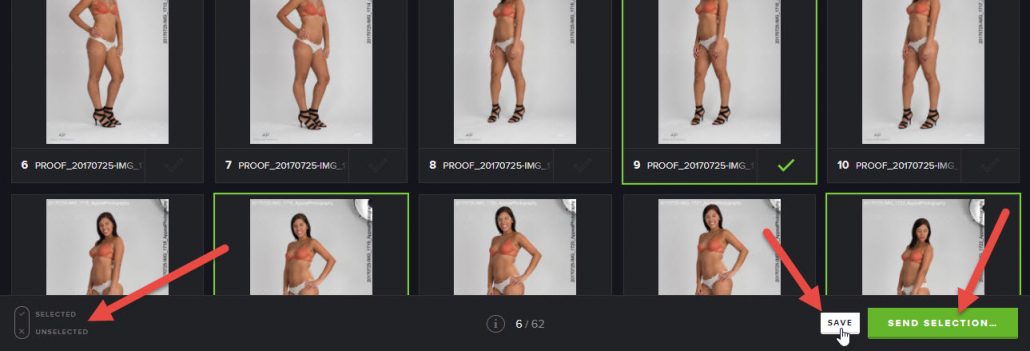
At the lower left of the gallery view, click on “SELECTED” to display only images you have selected; click on “UNSELECTED” to display only images you have not selected. (Click on the “X” to the left of these options to return to viewing all images.)
Important: Save your work often. Select “Save” at the bottom right of the gallery screen to save your work and return to it later.
Once you’re finished and ready to submit your selections, select the green button at the bottom right that says, “Send Selection.” (Be sure not to press the “Send Selection.” button until you’ve completed your selections.)
Step 6
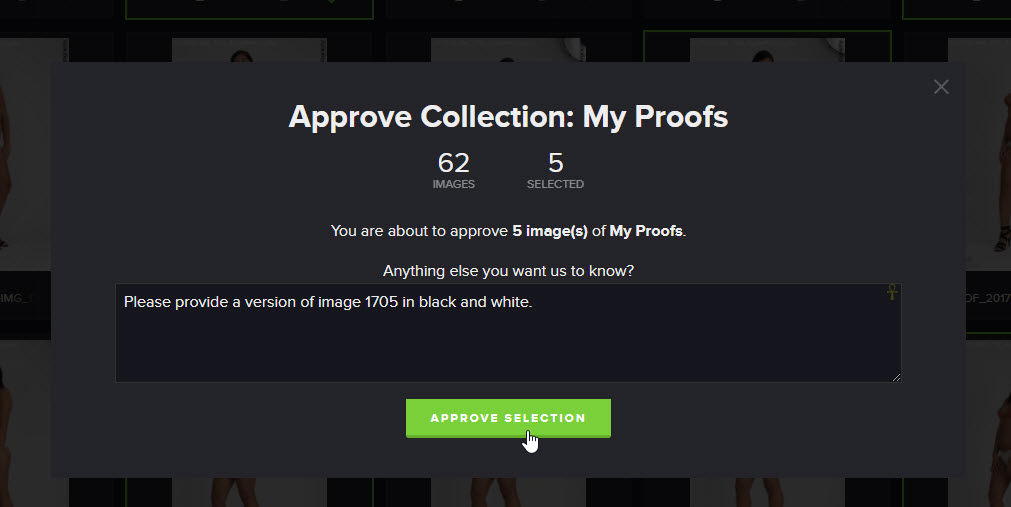
One you press “Send Selection.” you’ll see a comment section where you can provide any instructions for us. Please refer to images by their image name/number that you’ll see at the bottom of each image and watermarked on the image itself. Once you’re ready, select the green “Approve Selection” button to submit your selections to us. We’ll automatically be notified once you make your selections and will get to work on editing your images as soon as possible.
Once you submit your selections by pressing “Approve Selection,” you will be unable to make any further changes to your gallery. For security purposes, your online gallery will be deleted shortly after you make your selections. If you need to make changes or later decide you’d like edited versions of other proofs, just let us know and we’ll be happy to set up a new proof selection gallery for you.
If you are interested in a photo book or other printed products, we use the same process for you to choose which of your edited images you’d like to include.
Final, Edited Images
Step 7
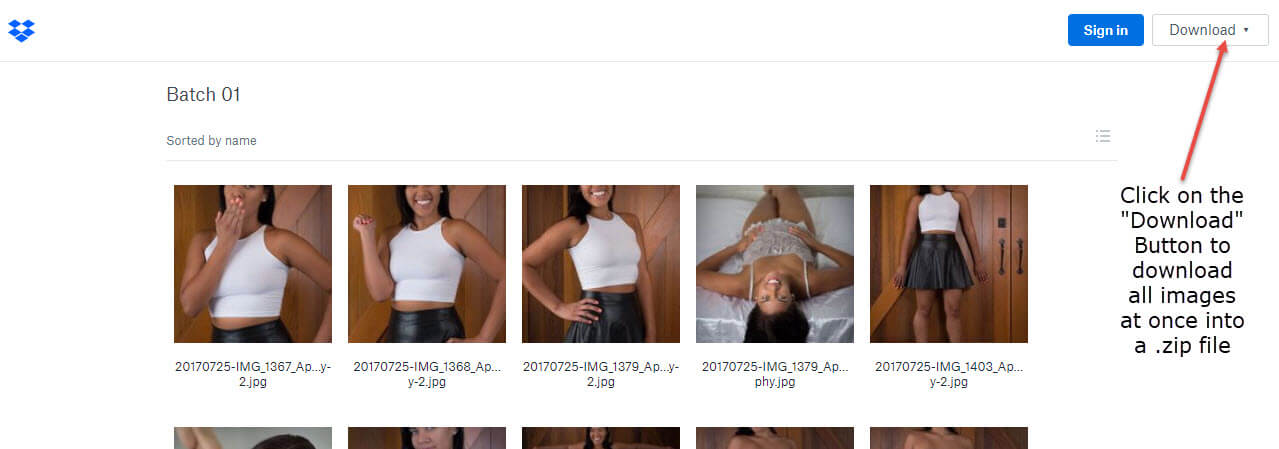
Once your final edited, full-resolution images are ready, we will send you a unique link and password to download them from our secure Dropbox account. You will be the only one with access to your images. Your imagery will be available online for a limited time, so please download and back up your images!
Step 8
Please be certain to back up your images! We strongly recommend at least one on-site and one off-site (e.g., cloud-based) back up for your files. (We maintain an encrypted off-site archive for all of our clients. However, we strongly encourage you not to depend upon us as your backup. There is a $50 service fee to restore your files.)
Given the personal nature of boudoir imagery, we also strongly recommend that you store your imagery on a password-protected device and/or encrypt your photos so that they remain private. We use and recommend the free, open-source software, VeraCrypt.

